Daisy Lane stamp set

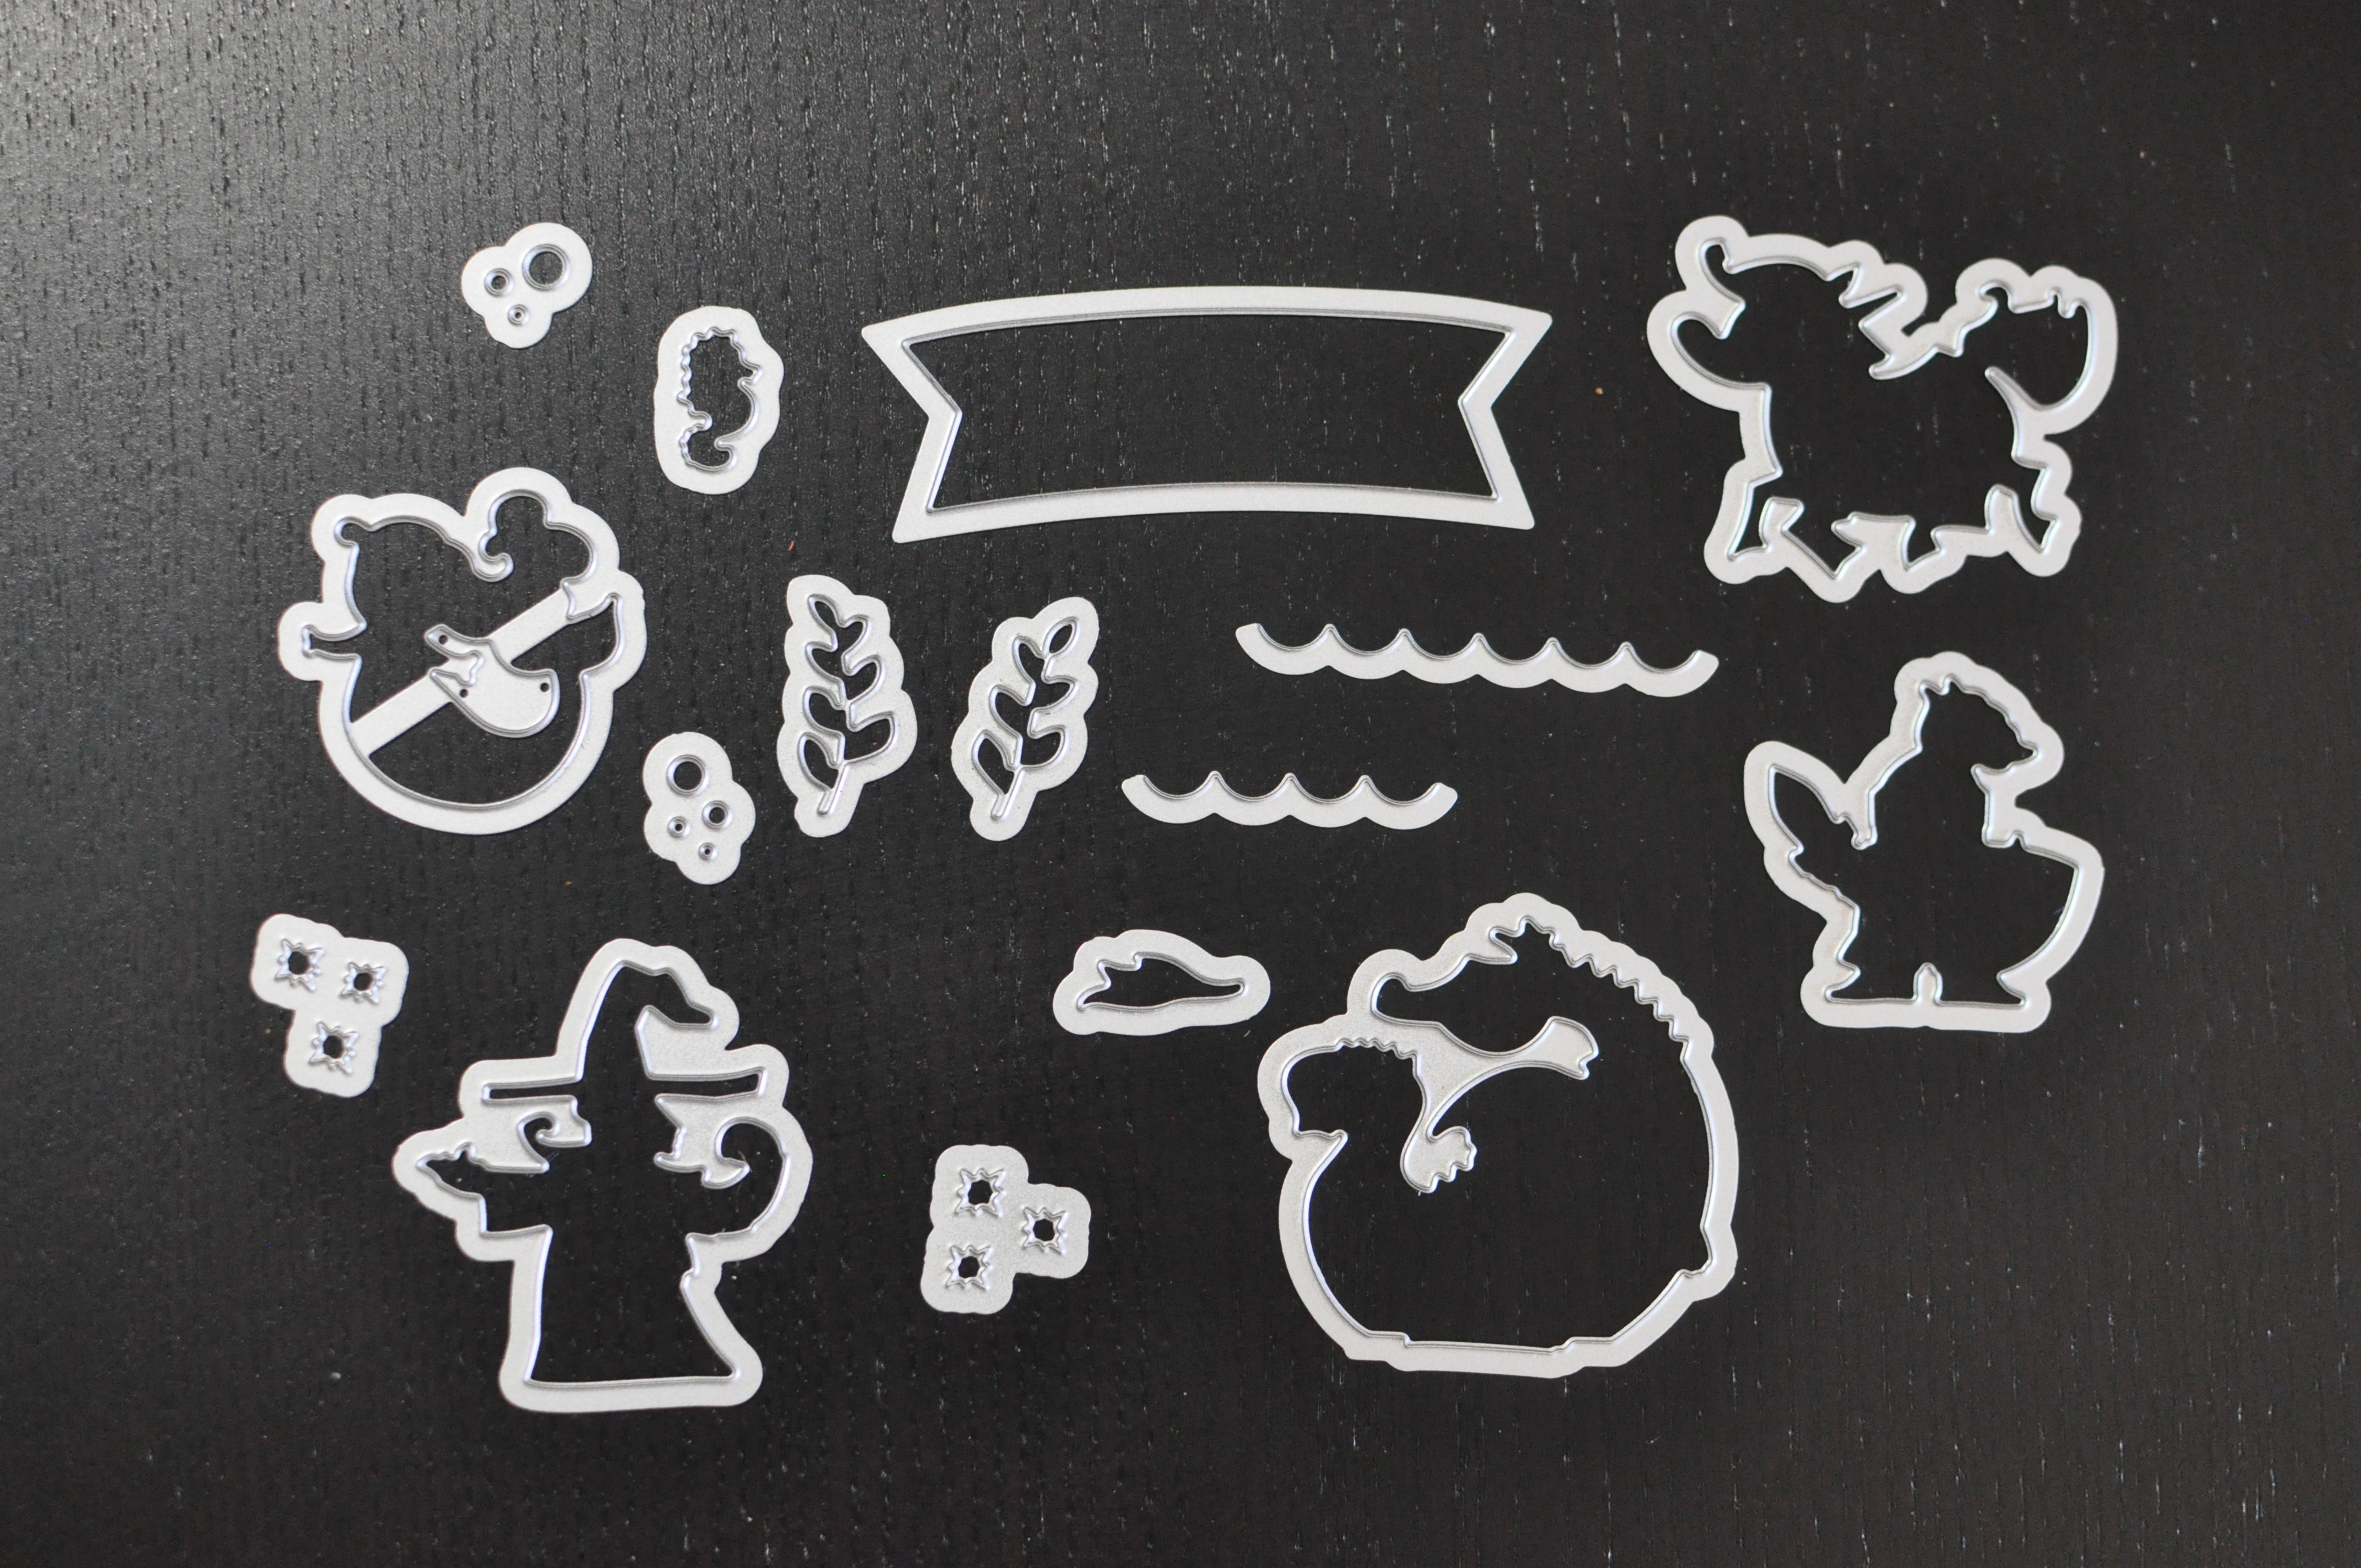
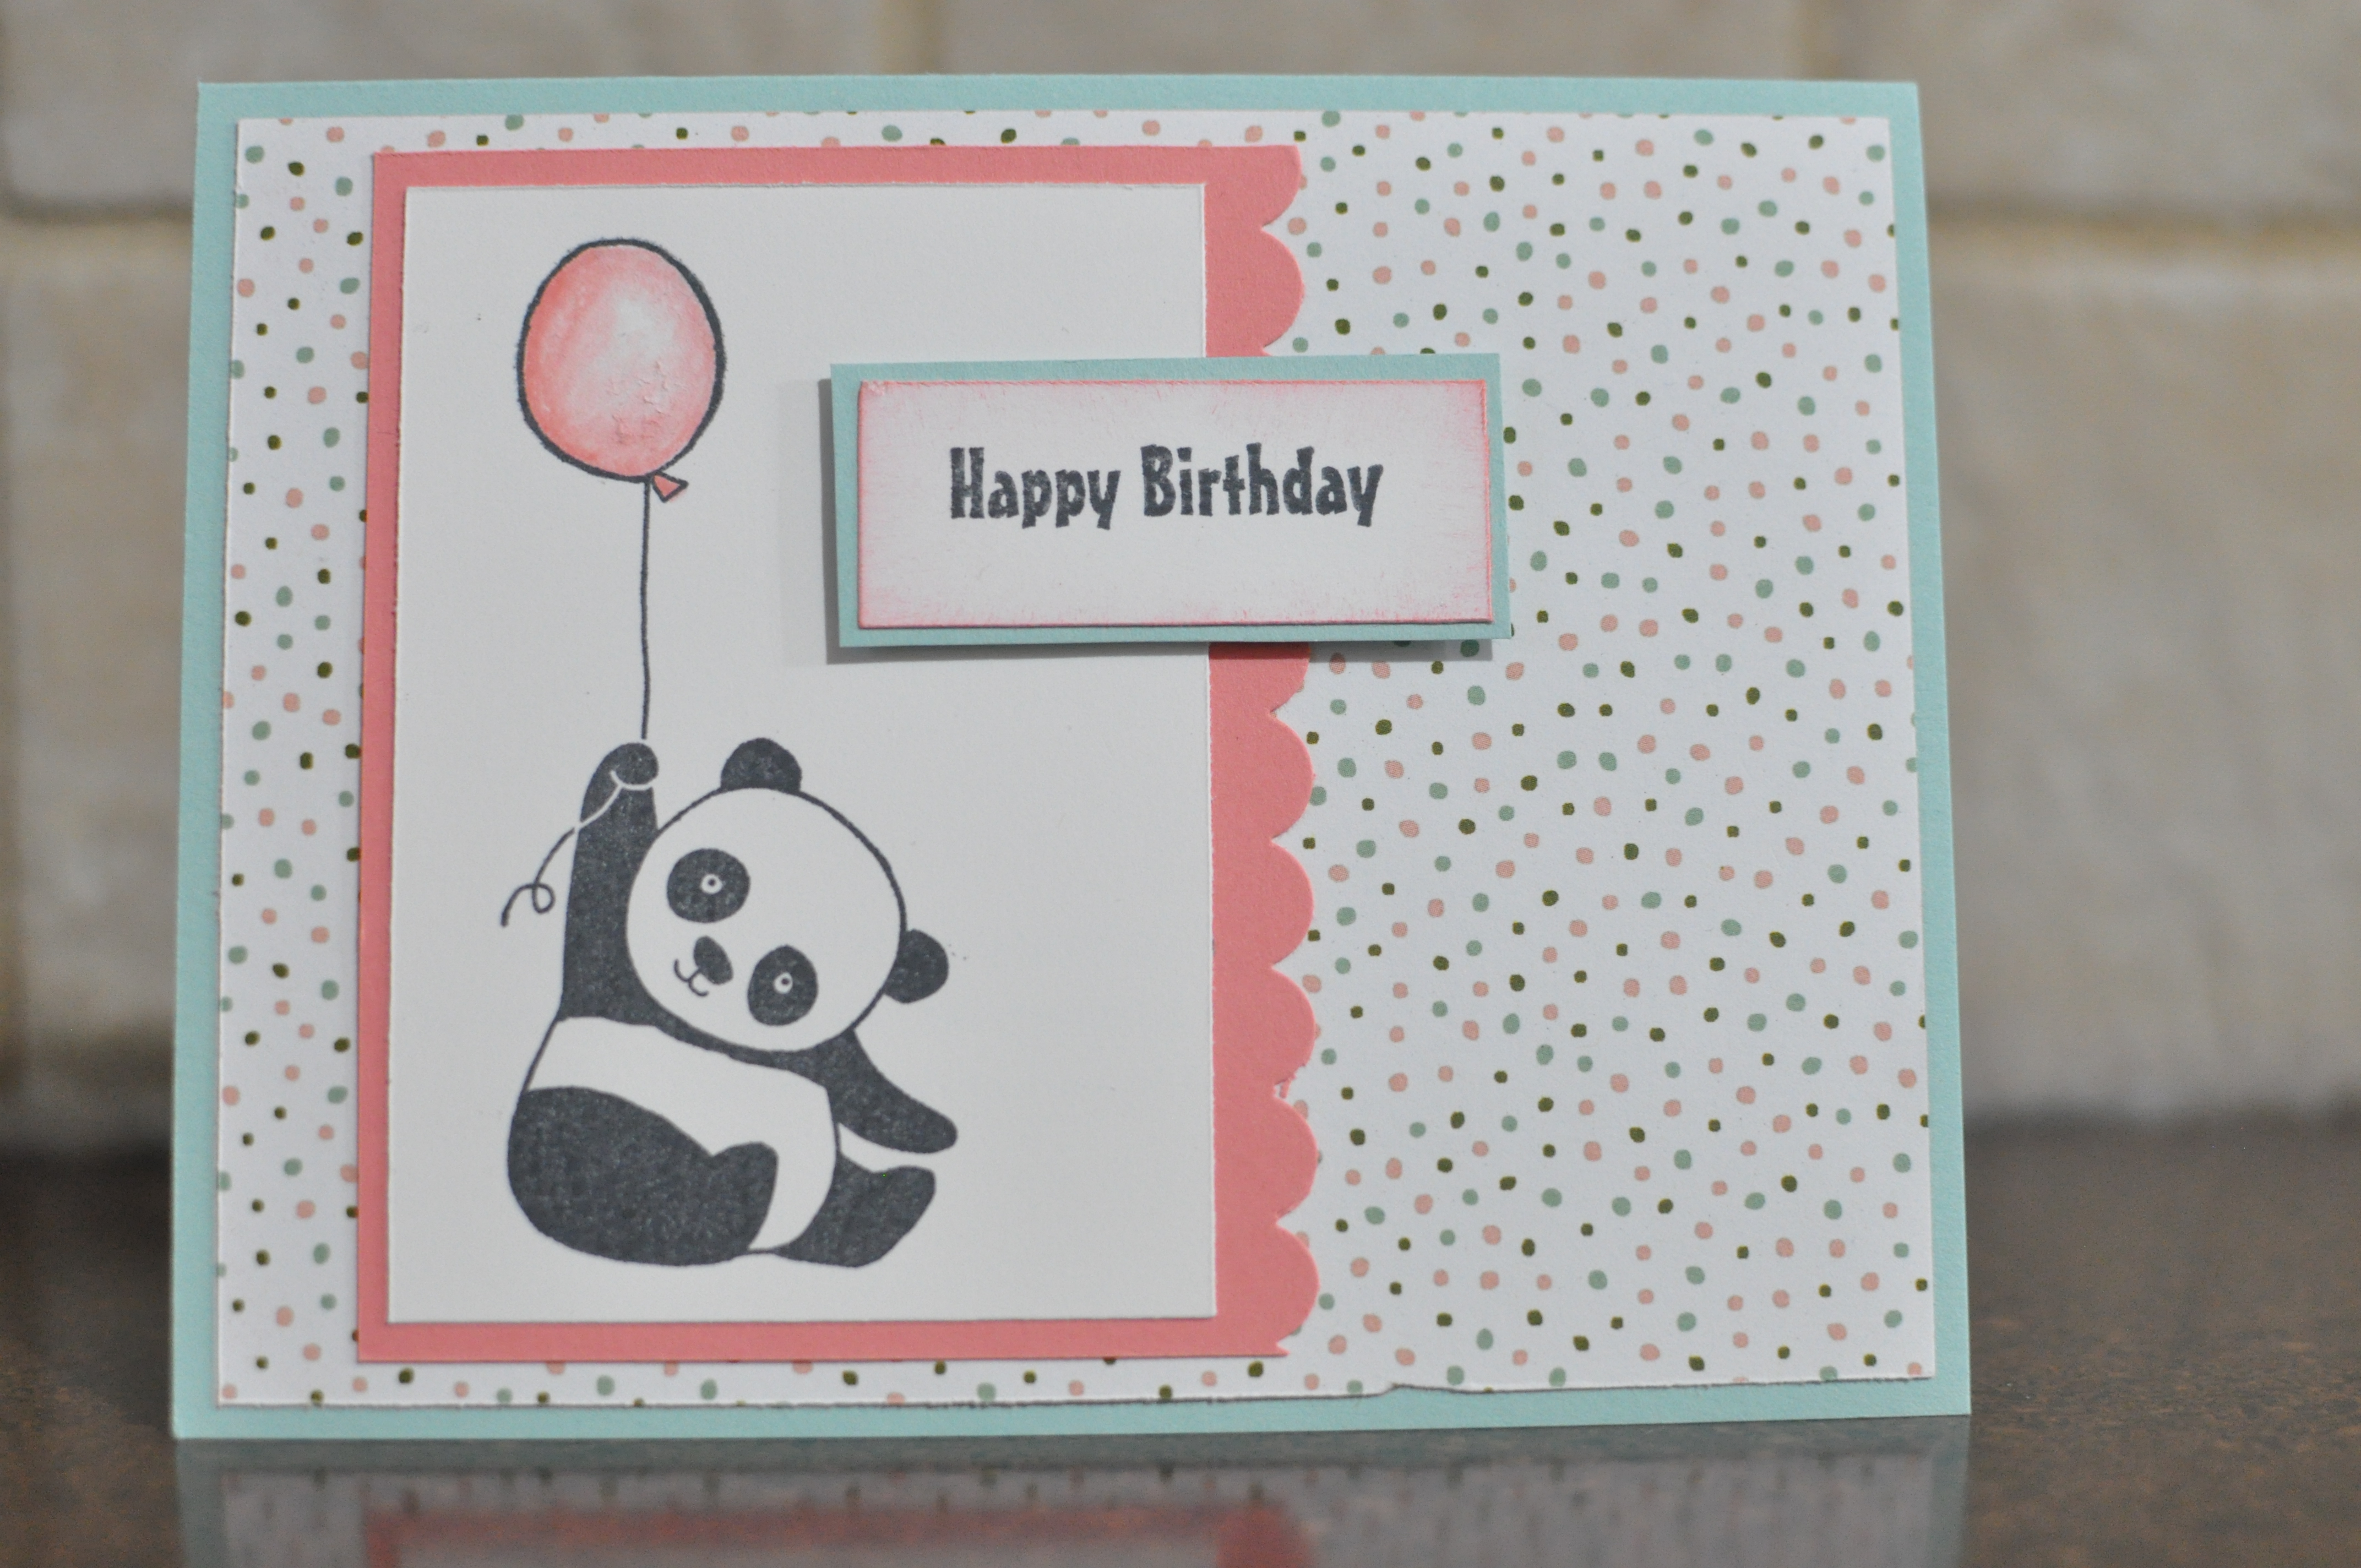
This is a wonderful set to get you started in the stamping world. Here is a picture of the set (it is much bigger in real life) and the cards I made with it for my beginner’s class.

DAISY LANE CLING STAMP SET

Here is the list of all the product I used for all three of these cards:

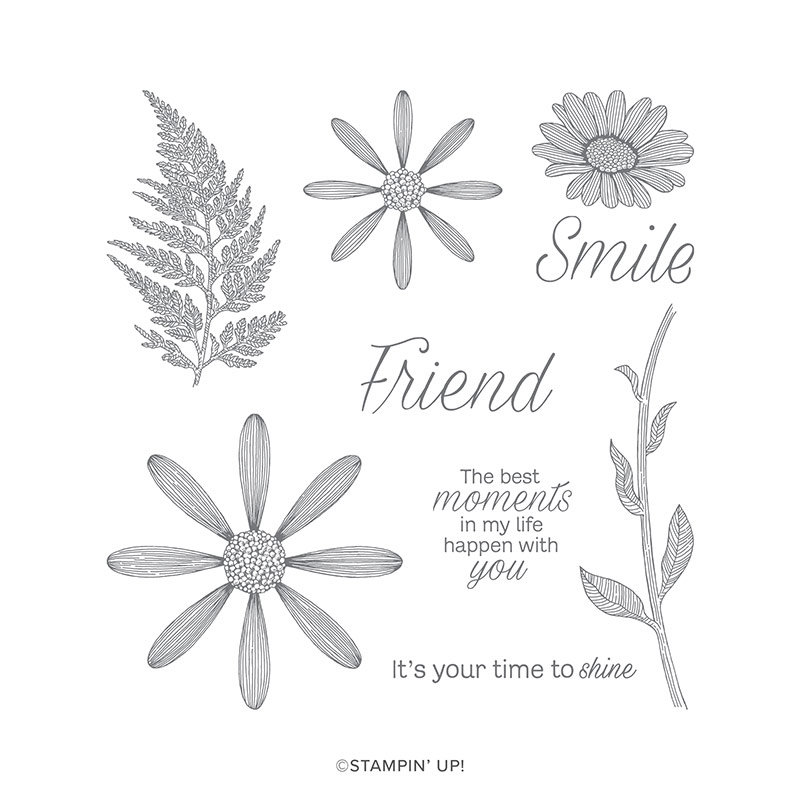
  • Daisy Lane stamp set: $31
  • Crushed Curry Classic Ink Pad: $10.25
  • Mossy Meadow Classic Ink Pad: $10.25
  • Thick Csrdstock Whisper White: $11.50

I assume a stamper already has these products:

  • Clear block D: $11.50
  • Stampin Dimentionals: $5.50
  • Tear & Tape Adhesive: $9.50
  • Paper Snips: $13.50

To make this project a little easier and faster you can add on the two daisy punches instead of cutting out the daisy flowers:

  • Daisy Punch: $24
  • Medium Daisy Punch: $22

And to save some money, get the Medium Daisy Punch and the Daisy Lane stamp set as a bundle for 10% off: two items together = $47.50

Want to see some more fancy options with this stamp set? Here you go:

Bonus Days!

This is a fantastic sale. For every $60 you spend in the month of July on Stampin’ Up! product, you will earn a $6 coupon that can be used in August. So yes, if you spend $120 you get a coupon for $12 worth of free product, and on and on it goes. So take a look at the website here: https://www.stampinup.com/en-ca or let me know that you would like a catalogue so you can see the product on paper, at actual size.

Bonus Days

Free Ink Pads!

Stampin’ Up! added a whole lot of new colours to their palate this year. And they are beautiful! To go along with this, they are offering an amazing deal, 10 ink pads for FREE! All you have to do is sign up to join my team. Becoming a demonstrator is simple. The starter kit is only $135 and you get:

  1. $165 worth of product of you choice
  2. $70 worth of business supplies
  3. 20% off all product purchased after you sign up
  4. invited to my team meeting, and support form me when you need it
  5. for the month of July, 10 free ink pads!

07.01.2018_FLYER_INK_PAD_CA

But hurry, this deal is only around for the month of July, 2018.

See you at my next team meeting!

Magical Day

Out of all the stets that are retiring this year, I am the most sad to see this one go. It’s my favorite, by far. It’s great for kids of all ages (even us grown up ones). So here are some cards made with this amazing stamp set and coordinating dies. If you like it, please order it before it’s too late. I would hate for anyone to miss out on this one.

All these cards use both the Magical Day stamp set and the Magical Mates Framelits dies. All additional materials and tools are listed below each card.

  • Additional stamp set: Let the Good Times Roll
  • Cardstock: Pool Party, Pacific Point, Pear Pizzazz, Whisper White
  • Ink: Tuxedo Black, Versa Mark, Pacific Point
  • White embossing powder
  • Tools: heat gun, Lots of Labels Framelits, Water Colour Pencils, Blender Pen, Stampin’ Dimentionals, Tear and Tape, Big Shot

  • Additional stamp set: Balloon Celebration
  • Cardstock: Melon Mombo, Pool Party, Elegant Eggplant, Whisper White
  • Ink: Melon Mombo, Tuxedo Black, Versa Mark, Pasific Point
  • Stampin’ Write Markers: Real Red, Calypso Coral, Daffidil Delight, Pear Pizzazz, Garden Green, Marina Mist, Elegant Eggplant
  • Embelishments: White Embossing Powder, ribbon
  • Tools: Heat tool, Big Shot, Tear and Tape, Stampin’ Dimentionals, Tri-corner punch

  • Cardstock: Rich Razzleberry, Wisteria Wonder, Whisper White, Myths and Magic Glimmer Paper
  • Ink: Tuxedo Black, Rich Razzlberry, Pacific Point, Water Colour Pencils
  • Tools: 2″ circle punch, 1 3/8″ circle punch, Owl punch, Big Shot, Stampin’ Dimentionals, Blender Pen, Stampin’ Sponge, Tear and Tape

  • Cardstock: Bermuda Bay, Pool Party, Whisper White, Very Vanilla, Pear Pizzazz, Garden Green, Myths and Magic Glimmer Paper
  • Ink: Tuxedo Black, Bermuda Bay, Stampin’ Blends Markers
  • Tools: Seaside Embossing Folder, Tear and Tape, Stampin’ Dimentionals, Big Shot, Aqua Brush


Party Pandas Card

Supply list:
Cardstock:
  • Pool Party: 5 1/2″ x 8 1/2″, 2 1/8″ x 7/8″
  • Designer Series Paper: 5 1/2″ x 4″
  • Flirty Flamingo: 3″ x 3 3/4″
  • Whisper White: 3 1/2″ x 2 1/2″, 2″ x 3/4″
Ink:
  • Momento Tuxedo Black
  • Classic Flirty Flamingo

Tools:

  • Blender Pens
  • Stampin’ Sponges
  • Clear Block E, C
  • Stampin’ Dimentionals
  • Tear and Tape adhesive

Pleated Ribbon Border

Hello one and all. I saw this trick done once and I loved it so much that I thought I would share it will all of you. I hope you love it as much as I do. If you find the video a little hard to see, I have also added two picture of what the project looks. I think it’s time I got a video recorder…


Here is a picture of the ribbon all folded over.

And here is a picture of what it looks like on the finished card.

Starting your Crafting Hobby

So many people would love to start making their own cards because it’s fun and meaningful. The value of a hand made card is so much more then one bought form a dollar store. People feel loved and appreciated when someone has gone to the effort to make them something. I have seen this time and time again.

I love making a difference in people’s lives and I would love to help others make a difference in their friends lives too. That is one of the reason’s I started selling Stampin’ Up! product. But when I hand people the catalogue and they really want to get something, they look and look and then put it down saying, “there is so much in there, I have no idea where to start.” They end up not getting anything and I feel bad that I was not able to help them in their desire to make a difference.

So I finally came up with my idea of a good starter kit. I also made a video on how to use these products. I hope this inspires you as much as it inspires me.

  • Stampin’ Dimensionals (regular or mini) $5.25
  • Stampin’ Mist $6.00
  • Stampin’ Scrub $22.50
  • Whisper White or Very Vanilla cardstock $11.25
  • Cardstock Pack (you chose what colours you like) $10.00
  • Linen Thread $6.25
  • Tuxedo Black Momento Ink Pad $8.00
  • Classic Ink pad (colour of your choice, probably match your cardstock pack) $8.50
  • Stampin’ sponges $4.25
  • Clear block E $16.00
  • second colour of ink $8.5
  • Blender pens $16.00

This brings the total to $122.50 meaning you can either pick 2 level 1 sale-a-bration items, or 1 level 2. I recommend Happy Wishes stamp set.

To order this starter kit, or something similar, please e-mail me at:

lora-lynne@frewing.ca

Clear Embossing With Ink

This is a technique that I picked up from some place I can’t remember. Thank you for whoever showed me this one. I love it. This is how you can Transform any colour of ink you have into an embossed image. Hope you like it!

Here is a better picture of the difference between just stamped with ink, and embossed with clear embossing powder:

Tie a bow

Everyone who has ever taken one of my workshops has asked me, “How do you tie your bows so perfectly?” or, “Can you tie my bows for me?” So I thought I would show you how I do it. Really, like anything else, it takes practice. Keep in mind that different ribbons will handle differently, but with a little persistence, I find this way of tying a bow works almost all the time.

How to ink your stamp

Most people when they first try and stamp a card, don’t really think about how to ink up their stamp. Or how to transfer that ink onto their paper. I mean, it’s simple right? Just put the stamp to the ink pad and then on the paper. Then they are disappointed with their stamped image because there are lines around the edges. If this is you, don’t worry. Everyone has done it. I am here to tell you that there is actually a technique to putting ink on your stamp, and another one for transferring that ink onto your paper so you can avoid those frustrating lines. The most important thing to remember when placing a stamp to an ink pad, or to paper is… NO ROCKING! This is not a rock concert. I hope you like the video.